Introduction
Tags are at the heart of managing a Shopify store. They can be used to label products, customers, and orders. Once the tags have been added to these entities, they can be used to search, filter, and subsequently perform specific tasks on these entities based on tags. This provides much-needed flexibility to store operators who can run a variety of processes that are not supported natively by the Shopify admin panel.
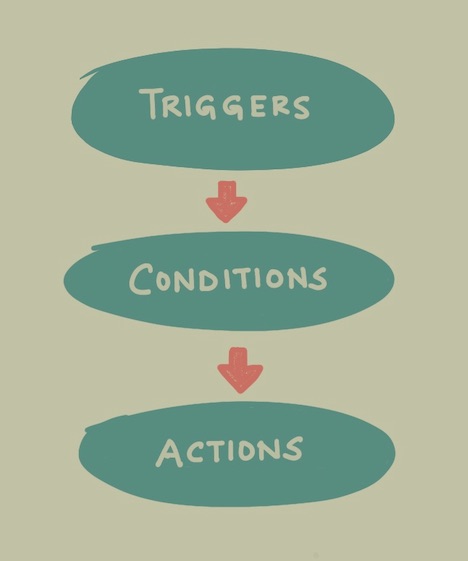
Leap Auto Tags allows you to configure workflows to automate the tagging in your store. Here's what a typical workflow looks like:
-
Triggers: Workflow execution starts with a "trigger event," which can be any of the following three types:
- Shopify Webhook -- any action or event that occurs within your Shopify store. These triggers could include things like a new order being placed, an item going out of stock, a customer signing up for a newsletter, or any other event that you specify.
- Backdating -- you can also choose to run the workflows manually on a set of existing entities in your store.
- Scheduled Run -- you can also schedule the workflow to run them at a specified date and time in the future.
-
Conditions: After a trigger event occurs, the app evaluates predefined conditions to determine if the automation should proceed. Conditions could include factors such as order value, customer tags, product types, or any other criteria you choose.
-
Actions: If the conditions are met, the app executes a series of predefined tagging actions. Right now, the app support following actions
- Adding fixed tags
- Adding dynamic tags
- Appending tags to the order note field
- Remove fixed tags
- Remove tags matching a regex pattern
- Expire tags after X days