Tag customers by products purchased
You can use Auto Tags to tag customers based on the products purchased by them. Here's a step-by-step instruction to create a workflow for the same:
Step 1 - Click on "Create Workflow"
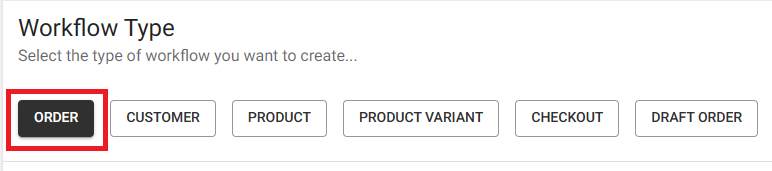
Step 2 - Select "Order" as the workflow type
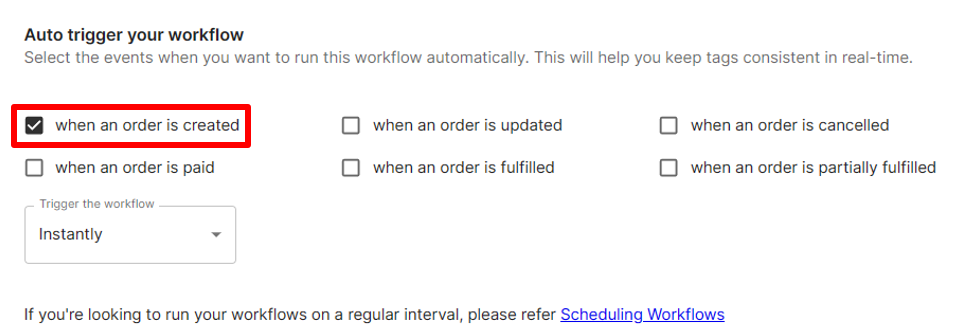
Step 3 - Select appropriate auto-trigger events
For instance, you can select "when an order is created" to automatically trigger the workflow on order creation. When a workflow is triggered, it will check for the conditions specified and if the conditions match, then tags will be updated.
Step 4 - Specify conditions
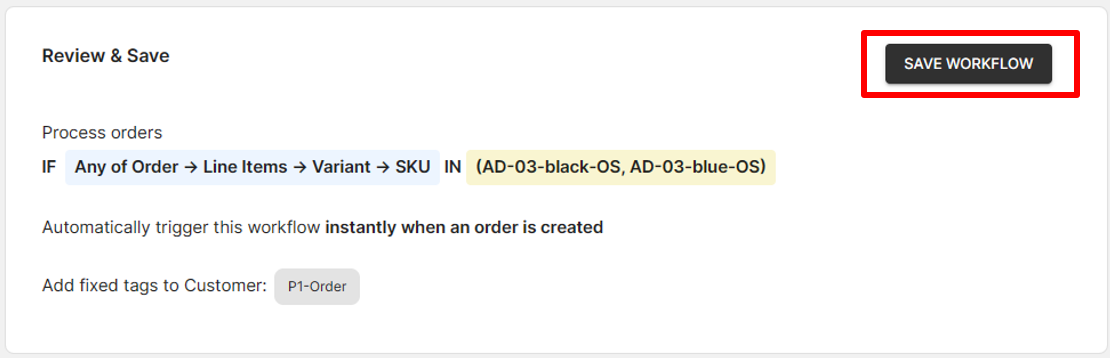
If you want to check if particular SKUs are present in the line items of the order, you can use the "IN" operator. The below conditions will match if at least one of the line items in the order has SKU set to "AD-03-black-OS" or "AD-03-blue-OS".
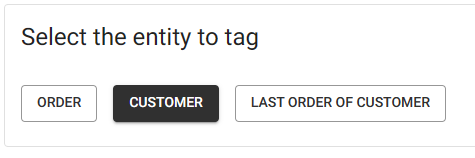
Step 5 - Choose "Customer" as the entity you want to tag
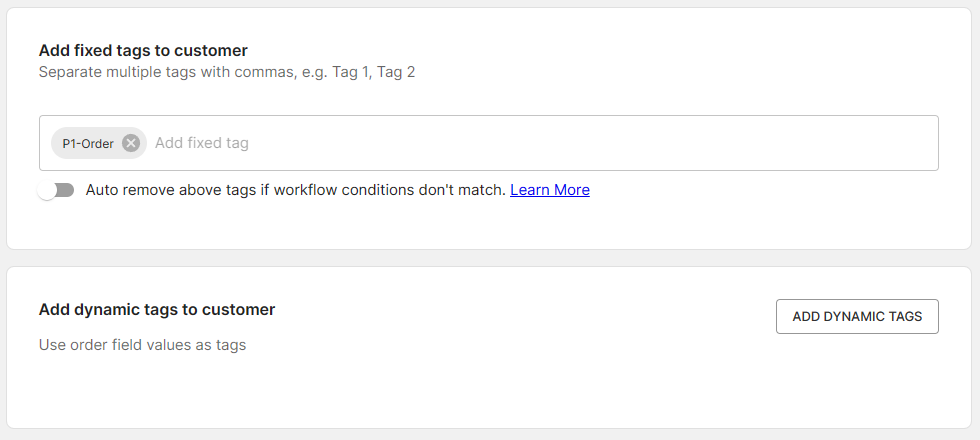
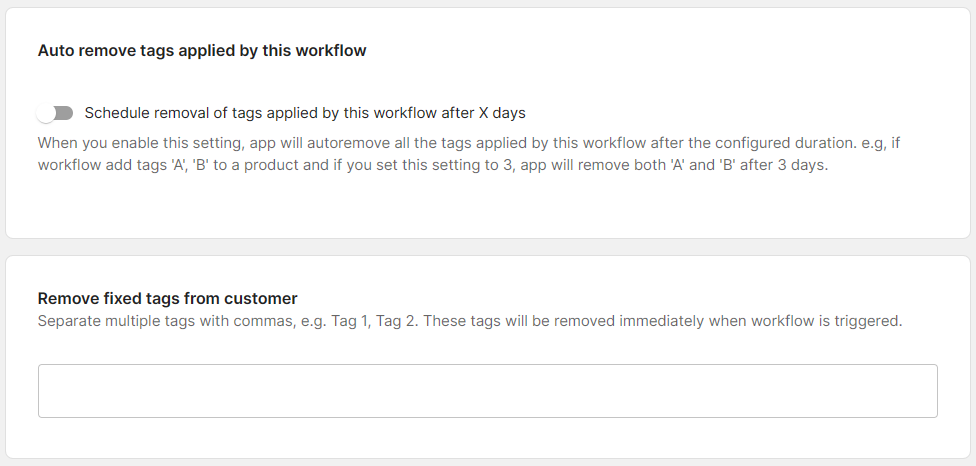
Step 6 - Specify tags you want to add or remove
You have the option to specify either fixed tags or dynamic tags for addition. Additionally, you can add fixed tags for removal or set the system to automatically remove tags applied by the workflow after a designated duration.
Step 7 - Save the workflow
Verify that all the configuration looks good and save the workflow.
Step 8 - Testing the workflow
Once you've created the workflow, it's essential to test it against some orders to ensure it is configured correctly. You can learn more about testing the workflow here.
Step 9 - Run workflow on existing orders
You can run the workflow on existing orders (historical orders) which in turn will tag corresponding customers if the conditions specified by you in the workflow match.
Click here to learn more about backdating.